Setting up a Pinterest for business account should be a priority for any blogger or small business that is serious about increasing their pageviews, both on the platform and for their website. There are a few steps you can take to ensure that your profile is optimized to be seen by the right audience as frequently as possible. Below I outline the 8 step process in setting up your Pinterest business account the right way in order to increase pageviews. Let’s dive in.
Step one: Set-up your Pinterest Account
This step will depend on whether or not you already have a Pinterest account.
Pinterest favours accounts that have been around for a long time, so if at all possible, I highly recommend just transferring your personal account to a business account. You can always set up another personal account at the later time. You can also change all your personal boards to show as “secret” so only you can see them.
Sign-up for first timers: If you don’t have a Pinterest account already, just head to pinterest.com and sign up. The link is at the bottom below the log-in area.
Already have an account? Switch from a personal Pinterest account to a business account by signing in and clicking on the “Pinterest for business” section.
Once you have a Pinterest business account set up, you need to be strategic about what language you are using in your business profile to attract the right audience and get your profile seen.
Step two: Set up your Pinterest Profile Business Name
Lets start with your Pinterest Profile Business Name. As a blogger, you should be familiar with SEO tactics for your blog posts. You need to start treating Pinterest the exact same way. Pinterest is a search engine, not a social media channel. That means keywords, meta descriptions, image names, the works. Whenever you have an opportunity to add keywords to something, be it a pin, image or profile – DO IT!
Your Pinterest business name is the perfect chance to allow prospective clients and fans to find you by using keywords.
Optimizing your Pinterest Business Name
You will want to try to include 2-3 keywords in your business name, but these need to be very strategic and to the point. Recently, Pinterest caught onto people using their name to target keywords. They now limit the business name to 30 characters. Well, I did some research and found a sneaky way around this. Download the pinterest app on your phone, and edit your business name there! For some reason, it doesn’t restrict the character limit. Once you save it, it will show up on the desktop version.
So, back to the keyword strategy in your business name. First things first, you need to get really clear about what your Pinterest profile is going to be focused on and what you want to be known for. Just like your blog, the riches are in the niches, and you should choose 1-3 areas you want to pin about that your audience will get value from. You also want to really think about your ideal client. What are they interested in and what are they searching for?
For me, I am a travel and lifestyle blogger that offers Pinterest services.
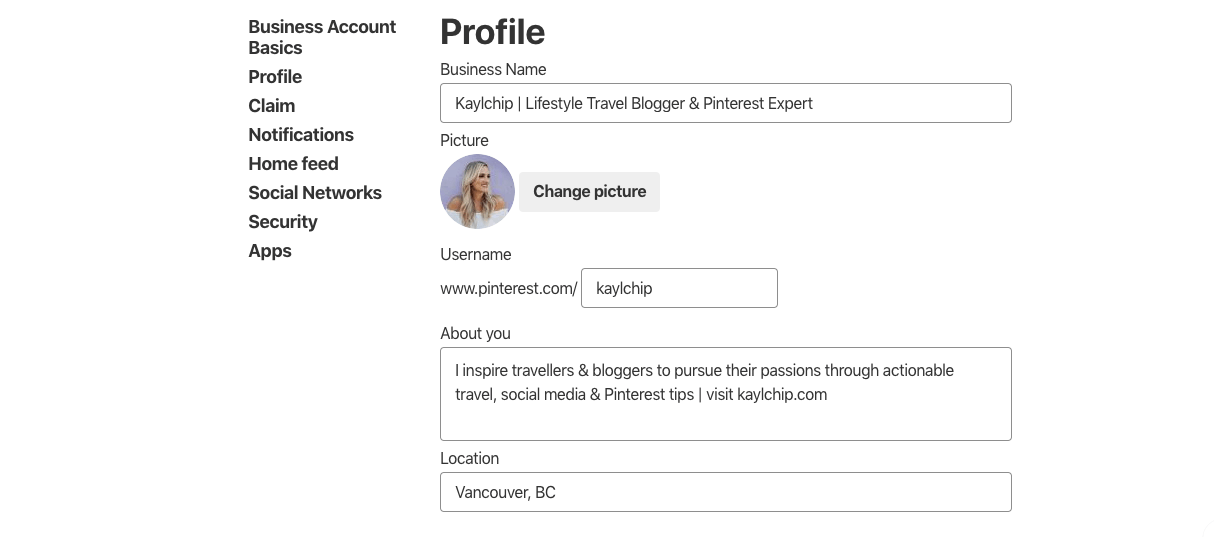
Now, when people look up anything pinterest related, my profile has a chance to show up in the search results. This is why you need to get really clear about what you want to be known for, and go all in on that.
Summary of the steps to setting up an optimized Pinterest Business Name:
- Include your business name at the beginning
- Seperate your business name and keywords using either a dash (-) or (|)
- Include 2-3 keywords you want to be known for (examples: wellness, copywriting, instagram strategy, volunteer travel etc – the more specific the better!)
- Make sure you edit this on your cell phone app as the desktop version restricts you to 30 characters
Step three: Choose Your Pinterest Bio Picture
Your bio picture is an integral part of your brand awareness. I recommend using the same picture across all platforms, especially if your blog has a bio picture in the sidebar or author box! This will allow for recognition and increase your know, like and trust factor. It is best to have a picture of you looking into the camera (someone once told me the eyes are the “window to the soul”, kinda creepy but makes sense). As you can see I need to take my own advice and update my headshot!! Hello procrastination, my old friienndd.
Okay, moving onto the type of business you want to select.
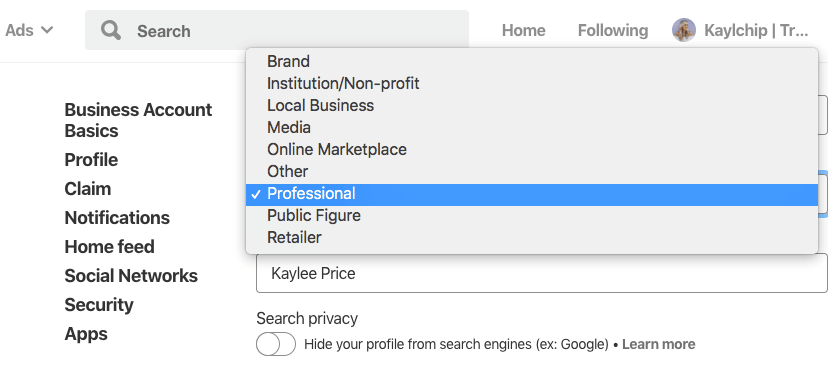
Step four: Decide which type of business account you are
I’m assuming 99% of you fall into the “professional” category, meant for any online marketing consultant, entrepreneur or creative (ex. bloggers, photographers, digital nomads). Here are a few examples of the others in case you fall under a different category:
- Public Figure – Celebrities, famous people
- Media – Actual media outlets like magazines or newspapers
- Brand – Established brands like Coca-cola
- Retailers – Clothing stores like Urban Outfitters
- Online Marketplace – Etsy
- Local Business – Restaurants, boutiques, good for location targeting
- Institution/Non-profit – Museums, charities
- Other – I don’t recommend using this as you want to tell Pinterest as much information as possible!
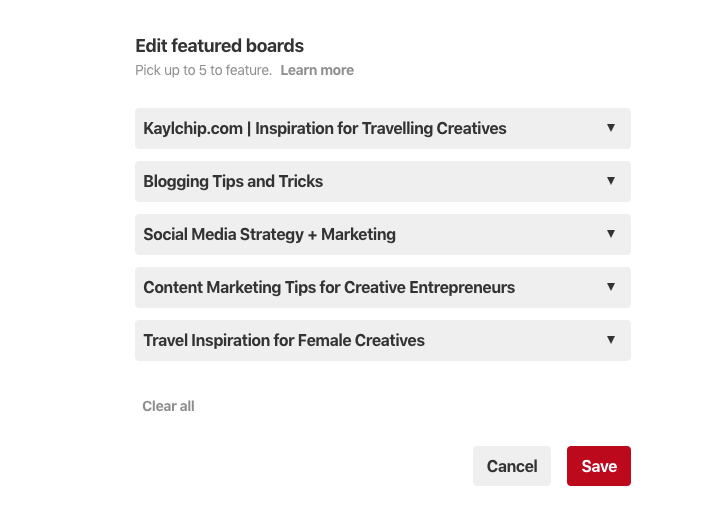
Step five: Decide on 5 featured boards
You will then want to establish what type of boards you want to create, and which 5 you want to include as your feature boards. Your feature boards should be 5 of the top topics you want to be known for. I target travelling creatives that want to start online businesses, so I have a couple travel related boards, and a few online business boards. Pinterest now offers sections within boards, so if you have a social media board, you can section it off with facebook, instagram and twitter sections.
Always make sure your website board is the top feature board.
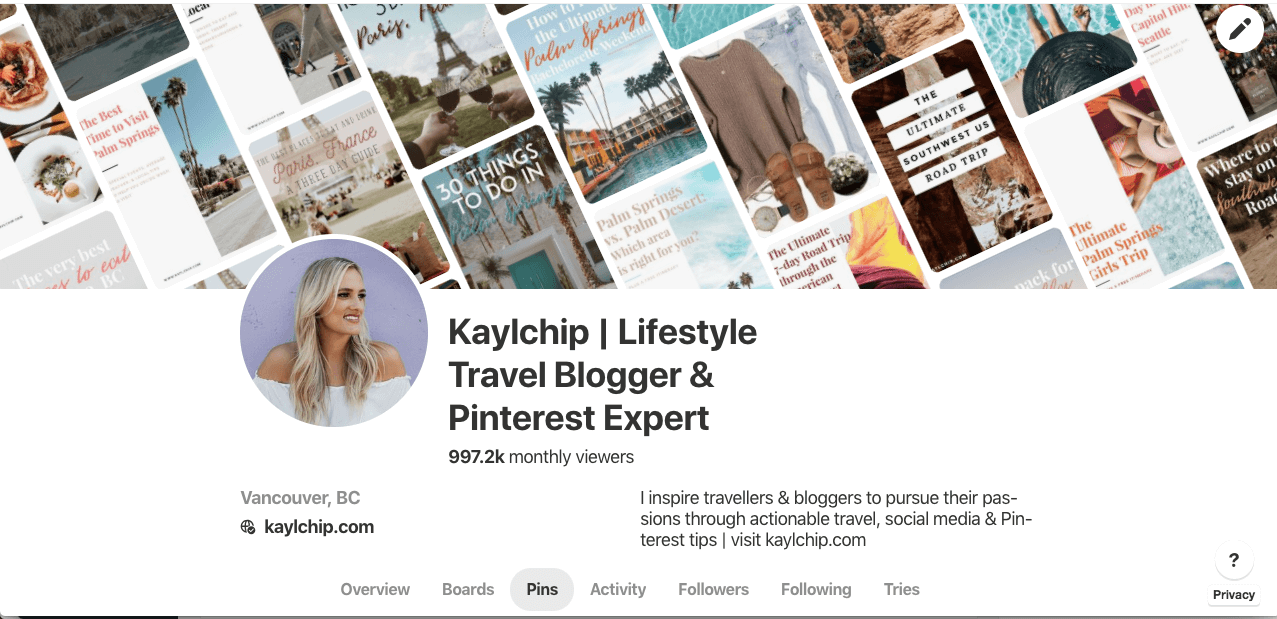
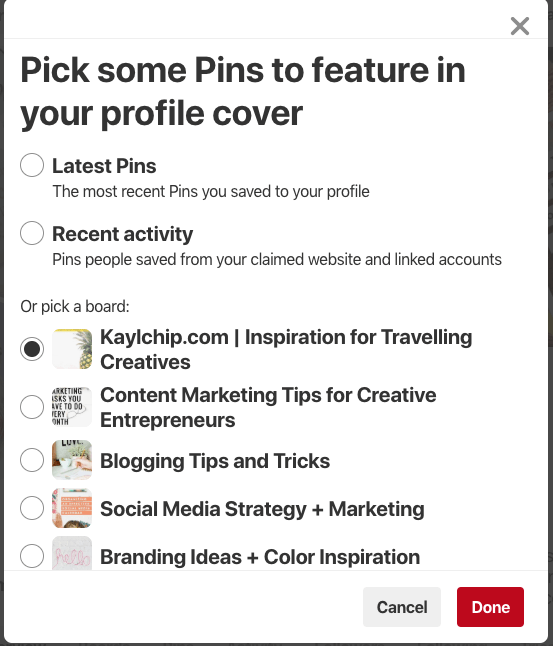
Pinterest now has a profile cover as you can see below that creates a diagonal collage of your pins above your profile. You can choose what setting you would like pinterest to gather the pins from to create this. You can choose either latest pins, recent activity, or a specific board. I recommend using the board you post only your content to. As you can see below, pinterest is taking my pins from my website board.
Here are the options to choose from:
Step 6: Writing your About You Section in Pinterest
The about you section is a very important part of your profile. Here you’ll want to include how you can help your audience succeed, explain what you focus on, and provide a call to action. Make it very clear as to who you help, and how. Read mine below for inspiration:

Here are some examples:
“I help new mothers prepare for pregnancy with prenatal health and wellness tips | download my 5 day wellness package [insert link for them to copy]
“We coach aspiring entrepreneurs on mindset and productivity | download our morning productivity guide”
“I provide copywriting tips for entrepreneurs launching online products | Grab my guide to launch copy [insert link to copy]
Step 7: Setting your Pinterest Location
If you are providing in-person services, or have a physical shop, be very specific about your location. If you focus on another area, for example, you blog about all things Morocco, it might be worth setting that as your location. You can also target certain timezones, or if your company head office is in a certain city or state.
Step 8: Claim your website
It sounds more complicated than it actually is!
Follow this link for instructions on how to do this – Claim your website
If you have the headers and footers plugin on WordPress, you can copy the meta tag there and it becomes very simple. Otherwise, follow the steps in this article and you should be good to go! The Pinterest support team is really great if you get stuck, so just contact them and they will be happy to assist you!
And there you have it! 8 simple steps to setting up a pinterest for business account to increase pageviews! Please reach out if you have any questions, or if you get stuck!
The comments +